Quick Answer: Govee permanent outdoor lights mount along rooflines, fascia, and eaves using brackets spaced 12–16 inches apart and connect to a standard outdoor outlet. Before installation, verify your outdoor outlet has GFCI protection — NEC 210.8(A)(3) requires GFCI protection on all 15- and 20-amp, 125-volt outdoor receptacles on dwelling units. If your exterior outlet is not GFCI-protected, have a licensed electrician install one before you begin. Govee lights are IP65-rated for rain and wind and carry a lifespan of 20,000–25,000 hours under normal use.
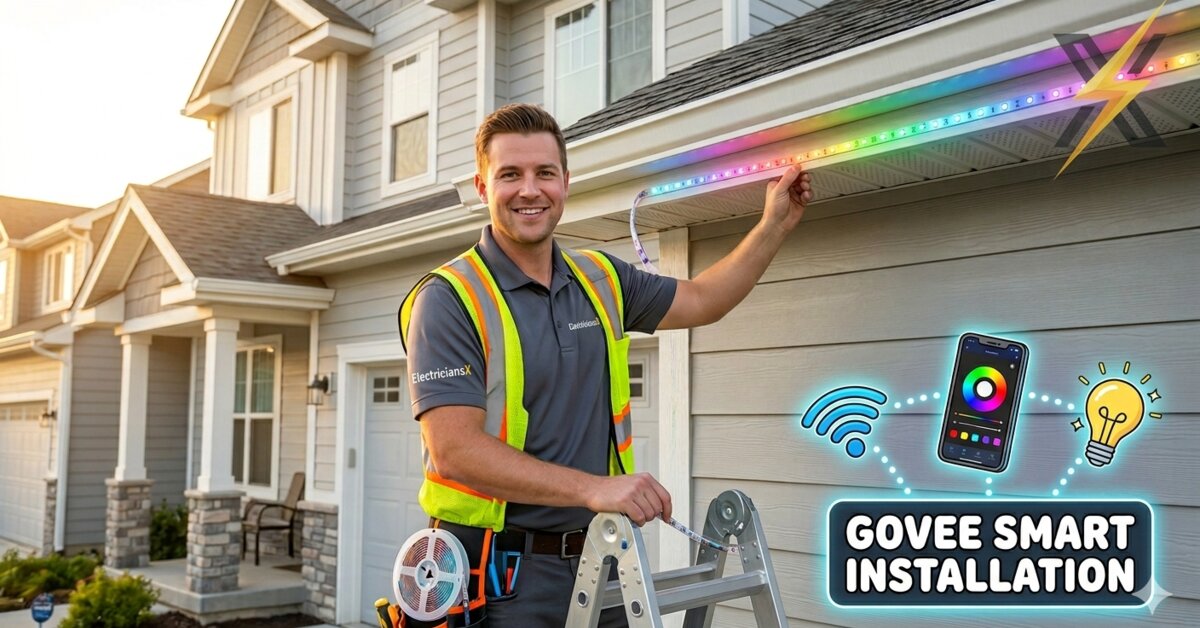
Govee permanent outdoor lights have become one of the most popular home lighting upgrades in Southwest Florida — and it is easy to see why. A single set of LED light strips installed along your roofline can outline your home for the holidays, light up game nights around the pool, and stay on as a subtle architectural accent the rest of the year, all controlled from your phone. They go up once and stay up, which is a significant advantage over seasonal string lights that need to be hung and taken down every year.
The installation is genuinely within reach for a capable DIYer — but there are a few places where the work intersects with your home’s electrical system, and those are worth understanding before you start drilling holes in your fascia. In particular, the outdoor outlet you are going to plug these lights into needs to meet current code requirements, and the mounting decisions you make on day one determine how good the lights look and how long they last in Florida’s coastal climate.
In this guide I will walk through the full installation process step by step — planning the layout, gathering tools and materials, mounting the brackets, running the cables, and setting up the smart controls — along with the electrical considerations that matter most for homeowners in Cape Coral, Fort Myers, and the rest of Southwest Florida.
What You Need Before You Start
Tools
- Power drill with masonry and wood bits
- Screwdriver set (Phillips and flathead)
- Level and chalk line or laser level
- Measuring tape
- Wire cutters and needle-nose pliers
- Safety glasses and work gloves
- Sturdy ladder rated for your roofline height
- Painter’s tape for marking layout points before drilling
Materials
- Govee light strips and mounting brackets (included in kit)
- Additional mounting clips (order extras — you will use them at corners and curves)
- Self-tapping screws and masonry anchors appropriate for your fascia material
- All-weather electrical tape
- Cable clips and UV-resistant zip ties
- Outdoor-rated extension cord if the power run exceeds the cable length in your kit
Verify Your Outdoor Outlet First
Before purchasing anything, walk your home’s perimeter and locate the outdoor outlets you plan to use. Press the TEST button on each outlet face. If the outlet has a TEST and RESET button directly on it, it is a GFCI outlet — good. If it is a standard outlet with no TEST button, look for a GFCI outlet elsewhere on the same circuit (sometimes in the garage or a bathroom) that protects it. If you cannot confirm GFCI protection, assume the outlet is unprotected.
NEC 210.8(A)(3) requires GFCI protection on all 15- and 20-amp, 125-volt receptacles installed in outdoor locations of one- and two-family dwellings. This has been a code requirement since 1978, but older homes throughout Cape Coral and Fort Myers still have unprotected outdoor outlets from original construction. An unprotected outdoor outlet is a code violation on new work and a genuine safety hazard — outdoor outlets are exposed to rain, humidity, and moisture intrusion that can cause ground faults. Have a licensed electrician replace or protect any unprotected outdoor outlets before you plug permanent lighting into them.
Step 1: Plan Your Layout
Walk the exterior of your home and decide which lines you want to illuminate — typically the roofline along the front and sides, the eaves, or both. Sketch a simple diagram or take photos from the street to visualize the finished look before you commit to drilling.
Measure the total linear footage of the path you plan to run. Add 10–15 percent to account for corners, connectors, and the drop from the roofline down to the outlet location. Mark your planned mounting points with painter’s tape — one mark every 12 to 16 inches along the run — so you can visualize the bracket spacing before drilling a single hole.
Note the location of your nearest outdoor outlet relative to where the power connection end of the light strip will land. The power supply unit needs to be positioned close to that outlet, protected from direct rain exposure. Most Govee kits include enough cable to reach a nearby outlet, but measure the run before you assume the kit cable is long enough.
Step 2: Prepare Your Mounting Surfaces
Govee mounting brackets attach to your fascia board — the flat board that runs along the bottom edge of your roof. Before drilling, confirm the fascia is structurally sound. Rotted or soft fascia in coastal Florida is not uncommon; prod the wood with a screwdriver in a few spots. If the fascia gives easily, address the wood rot before installing lights. Brackets anchored into rotted wood will pull out.
For wood fascia, drill pilot holes slightly smaller than your screw diameter at each marked point. For fiber cement fascia — common on newer construction throughout Cape Coral and Fort Myers — use self-tapping screws rated for fiber cement. For stucco or masonry surfaces on the wall rather than the fascia, use masonry anchors appropriate for the screw size in your kit.
Space brackets evenly — typically 12 to 16 inches apart along straight runs, with an additional bracket at every corner and direction change. Even spacing produces a uniform light line. Uneven spacing creates visible bright spots between brackets where the strip sags.
Step 3: Install the Brackets and Attach the Light Strips
Install all brackets along the run before snapping in the light strip. This lets you adjust spacing and alignment while you still have a clear view of the fascia. Use a chalk line or laser level to keep the bracket row straight — a level line of lights looks intentional; a wavy one looks like an error.
Once all brackets are in place, start at the power supply end and snap the light strip segment by segment into the brackets. Govee strips are designed to click into the mounting hardware with firm hand pressure. At corners, use the corner connectors included in the kit and add an extra bracket on each side of the corner to prevent the strip from pulling away from the turn under thermal expansion — which is significant in Southwest Florida’s temperature swings.
Step 4: Run and Secure the Power Cables
The power cable that runs from the light strip down to your outlet is the most visible part of the installation if it is not managed carefully. Plan the cable route before you start — ideally following a downspout, a corner trim board, or another vertical element that gives the cable a natural path to the outlet.
Secure the cable with UV-resistant cable clips every 12 to 18 inches along the run. In Florida’s intense sun, cable clips and zip ties that are not UV-rated become brittle within a season and fail. Leave a small amount of slack at every corner and direction change — a cable pulled taut will pull at connection points when the house expands and contracts with temperature changes.
Seal the connection between the power supply and the light strip with the weather protection caps included in your kit. All connection points should be protected from moisture intrusion. In coastal Lee County and Charlotte County environments, salt air will find any unsealed connection point and begin corroding the metal contacts within months.
Plug the power supply into your outdoor outlet. Use a weatherproof in-use cover on the outlet — a cover that remains closed when nothing is plugged in is not enough for a permanent installation. A while-in-use cover allows the outlet to be fully covered with the cord plugged in, protecting the connection from rain. NEC 406.9(B)(1) requires while-in-use covers on outdoor outlets in wet locations.
Step 5: Set Up Smart Controls in the Govee Home App
Download the Govee Home app on iOS or Android and create an account. Put the controller in pairing mode (typically by holding the power button until the indicator flashes), then follow the in-app prompts to add the device via Bluetooth and then connect it to your home WiFi network. WiFi connectivity is required for voice assistant integration and remote control when you are away from home.
Once connected, test every lighting mode to confirm all segments are functioning before you button up the installation. Walk the entire run and look for any segments that are not lighting, flickering, or showing incorrect colors — these should be resolved before the weather protection caps are fully seated and you are back down the ladder.
Set up a schedule in the app — Govee lights are most useful when they come on automatically at dusk and turn off at a set time. You can also configure seasonal color programs, sync lights to music for outdoor gatherings, and create scenes for different occasions.
Common Mistakes Homeowners Should Watch For
1. Skipping GFCI verification.
Plugging permanent outdoor lighting into an unprotected outdoor outlet is a code violation and a real shock hazard in a state where afternoon thunderstorms are a daily occurrence from May through October. Verify GFCI protection before the lights go up — not after.
2. Using non-UV-rated clips and zip ties.
Standard black zip ties sold at hardware stores are UV-resistant. Clear or colored generic ties often are not. In direct Florida sun, non-UV clips become brittle and fail within one season, dropping your cable runs. Specify UV-resistant hardware and replace any clips that show cracking or discoloration.
3. Anchoring into rotted fascia.
Govee brackets pull out of soft wood under the tension of a full strip run, especially after wind. Probe your fascia before drilling. If it is soft, rotten, or painted over without being replaced, address the wood condition first.
4. Ignoring thermal expansion at corners.
Florida temperature swings between a January night and an August afternoon can exceed 60 degrees. Light strips and cables expand and contract significantly over that range. Leave slack at corners, use proper corner connectors, and add brackets close to every direction change to prevent the strip from pulling free over time.
5. Positioning the power supply in direct rain exposure.
The Govee power supply unit is weather-resistant but not designed for direct, sustained water exposure. Mount it under a soffit overhang or behind a trim board where it is sheltered from driving rain. Govee lights are IP65-rated — dust-tight and protected from water jets — but IP65 is not the same as submersible.
Florida and Southwest Florida Considerations
Hurricane Preparedness
Govee permanent outdoor lights are designed to stay up year-round, but before a named storm makes landfall, unplug the power supply from the outdoor outlet and store the controller indoors if possible. The LED strips themselves can typically withstand high winds within their IP65 rating, but surge protection for the controller electronics matters. A whole-home surge protector or a UL-listed surge-protecting outdoor outlet cover is worth adding if you plan to leave the lights connected during storm season.
Salt Air and Connector Corrosion
In communities along the coast — Cape Coral’s western sections, Fort Myers Beach, Bonita Springs, Marco Island — salt air accelerates corrosion at every unsealed metal connection point. Apply a thin coat of dielectric grease to all connection points before seating the weather protection caps. Inspect connections annually for signs of oxidation or green corrosion and clean or replace as needed.
Outdoor Outlet Capacity and Multiple Light Sets
If you are planning to run multiple Govee sets — common on larger Southwest Florida homes with rooflines on three or four sides — calculate the total amperage draw before plugging everything into one outdoor outlet. Govee permanent light sets typically draw 1–2 amps per controller at maximum output. A standard 20-amp outdoor circuit can handle multiple sets, but avoid daisy-chaining power supplies through extension cords. If the outlet location requires a long cord run, have a licensed electrician install an additional outdoor outlet closer to the intended connection point.
Soffit and Fascia Materials in New Construction
Newer construction throughout Cape Coral and Fort Myers increasingly uses aluminum soffit and fiber cement fascia rather than wood. Aluminum soffit requires self-tapping metal screws for bracket attachment; standard wood screws will spin without biting. Fiber cement fascia chips if drilled without a pilot hole. Use the correct fastener and technique for your specific fascia material to avoid damaging the trim or producing a loose bracket that will work itself free over time.
Want Govee Permanent Lights Installed Professionally?
We handle the full installation — GFCI outlet verification or upgrade, bracket mounting, cable management, and power connection — so the finished product looks clean, stays up, and meets current electrical code. If you need a new outdoor outlet added or an existing one upgraded to GFCI, we handle that at the same time.
We serve Cape Coral, Fort Myers, Naples, Bonita Springs, Estero, Marco Island, Lehigh Acres, and Port Charlotte. Call us before hurricane season to get on the schedule.
Call or text: (239) 888-8888
Florida Electrical License #EC1111111
electriciansx.com
Related Articles: Browse All Articles | [What Is GFCI Protection and Where Does the NEC Require It?] | [Outdoor Electrical: What You Need to Know About Lanai and Pool Deck Wiring] | [Surge Protection for Your Home: What It Is and Why Florida Homeowners Need It]
Primary Keyword: how to install Govee outdoor lights
Secondary Keywords: Govee permanent outdoor lights Cape Coral, outdoor lighting installation Fort Myers, smart outdoor lights Southwest Florida, permanent outdoor lights Florida roofline, GFCI outdoor outlet Lee County